Lily forplantning og omsorg
Innhold:
Liljer er luksuriøse flerårige blomster som forbløffer med en rekke nyanser og prakt av blomstring, de har en stor hær av fans over hele verden og mange drømmer om å dyrke disse fantastisk vakre blomstene i sommerhuset. Selvfølgelig er den enkleste måten å plante en lilje å kjøpe en løk fra en blomsterbutikk eller hagesenter og dyrke den i landstedet ditt. Men hva om du vil ha et stort blomsterbed med liljer? Eller er det en mulighet til å bytte plantemateriale med naboer i landet? Hvordan få tak i dette plantematerialet? Du vil sannsynligvis bli overrasket, men i tillegg til den tradisjonelle reproduksjonen med datterpærer eller "babyer", er det flere måter å avle liljer på, de er ganske forskjellige, så du kan sannsynligvis velge den som er mer praktisk for deg.
Reproduksjon av liljer: deling av busken
Denne metoden er god for raskt voksende liljesorter som danner et stort antall løker og må plantes hvert tredje år. Alle, selv en ny blomsterhandler, kan takle en slik prosedyre, det viktigste er å forberede seg godt og handle nøye. Husk at du vokste en stilk i det første året etter at du hadde plantet en lilje -pære? Hvor mange av dem er det nå? Det er nettopp i så mange deler at du må dele busken. Forbered brønnene på forhånd for nye planter. Veldig forsiktig (helst med en høyde, ikke en spade), grave ut busken, skille løkene og stilkene forsiktig og plant hver på sitt nye sted. Jeg gjentar at hvis du handler forsiktig og forsiktig, vil stresset for plantene være minimalt, og det neste året vil de blomstre fullt ut. Det er mulig å utføre prosedyren for å dele busken om sommeren, etter slutten av blomstringen, når plantene forbereder seg på en hvilemodus. Det er ingen kontraindikasjoner mot vårtransplantasjonen, men i dette tilfellet vil sannsynligvis ikke liljer blomstre i den nåværende sesongen, siden alle krefter vil bli rettet mot forankring og tilpasning på et nytt sted. Ved å dele busken får du ikke en hel liljehage over natten, men disse plantene vil blomstre så raskt som mulig.
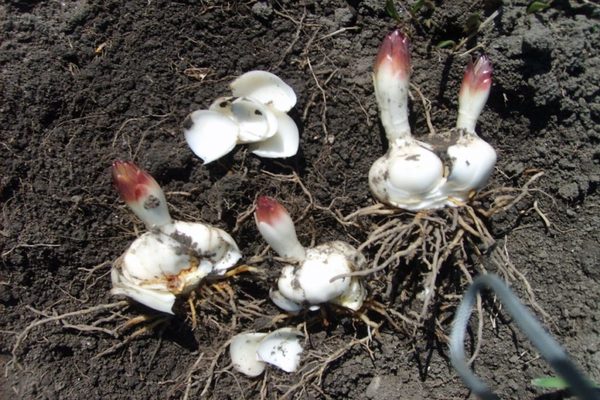
Lily forplantning: datterpærer
Operasjonsprinsippet er det samme som i den forrige metoden - grave opp busken og skille de nydannede datterpærene eller "babyene". Forskjellen er at dette bør gjøres når planten er ferdig med vekstsesongen, akkumulerer næringsstoffer og går i hvilemodus. Dette skjer omtrent en måned etter blomstringens slutt, og den siste visningen av stammen kan tjene som et signal for handling. Grav også forsiktig ut moderplanten med en høygaffel, inspiser delen av stammen som var under jorden - det er på den datterløkene vokser. Mest sannsynlig vil de vise seg å være små og ute av stand til å blomstre i neste sesong, så de må skilles forsiktig og plasseres på en spesielt forberedt seng med fruktbar jord, der de blir værende til fullstendig dannelse. Om vinteren anbefales det å kappe jordoverflaten med halm eller tørre fallne blader for å beskytte unge løker mot frost.
Hvis du finner ut at noen av dem har dannet knopper neste år, er det bedre å kutte dem, siden blomstring vil ta mye energi og ikke vil la unge løker vokse seg sterke nok. Etter prosedyren for å skille barna, returnere moderplanten eller transplantasjonen, vil arbeidet ikke bli reflektert over det og blomstring kommer til vanlig tid.Etter et år vil barna bli dannet, og de kan transplanteres i blomsterbed til et permanent sted (det er bedre å gjøre dette til høsten). Dermed får vi blomstrende liljer to år etter at datterløkene ble separert. Mest egnet for reproduksjon på denne måten er varianter av liljer som danner mange datterpærer: "kanadiske", "gyldne", langblomstrede varianter, samt "rovdyr" - "Tigrovaya" og "Leopardovaya".
Bobler
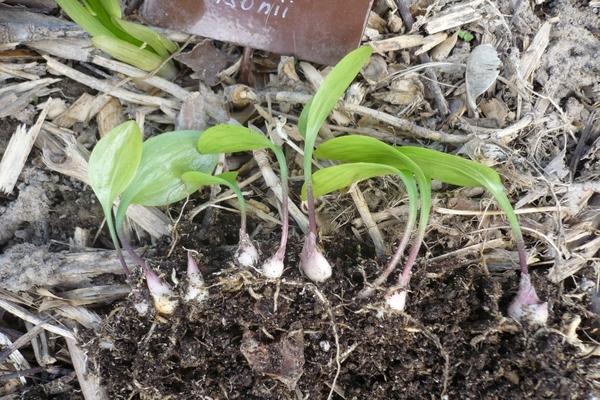
Som vi allerede sa, er liljer veldig forskjellige, og utviklingsprosessen kan være litt annerledes. Ikke alle danner erstatningspærer, ikke alle varianter vokser "babyer" på den underjordiske delen av stammen. Det er også slike varianter av liljer, der det dannes barn på luftdelen, i bladene på bladplatene, og kalles luftpærer. På en lilje kan det danne seg flere titalls slike luftige pærer eller "løker", som deretter bare faller av, legger ned røtter og deretter utvikler seg som en uavhengig plante. For å unngå fortykning av plantene er det nødvendig å kontrollere denne prosessen og ha tid til å samle løkene før de faller av og begynner å spire. Så snart du merker at det er røtter på dem, kan du prøve å skille en luftpære fra stammen - hvis det gikk lett, så er tiden inne og du kan samle alle pærene. Størrelsen overstiger vanligvis ikke 1 cm i diameter, fra 4 til 8-9 mm, og de er ordnet i par eller trillinger. Forbered stedet på forhånd hvor liljene dine vil få styrke de neste årene, for å fullstendig danne og bli til fullverdige blomstrende planter, trenger de tre til fire år, men du vil umiddelbart motta en stor mengde sunn, sterk plante materiale.
Etter at du har samlet luftpærene, bløtlegg dem i et par timer i fundamentet, og plant dem deretter til en dybde på 1-1,5 cm, og hold en avstand på omtrent 9-11 cm mellom dem. Avstanden mellom pærene. skal være minst 20 centimeter. Ja, nå er de veldig små, men ikke glem at om tre år blir de til voksne løker, og hvis de er veldig tett plantet, vil de ikke ha nok plass og næringsstoffer. Etter at du har plantet alt, vanner du jorden og klipper den med torv-, halm- eller grangrener. I denne formen vil pærene dine overvintre. Neste år, om våren, fjerner du mulken, gir lett tilgang til liljer, og pleier dem som vanlig - vann og ugress i tide. I løpet av dette året vil bare blader vises på jordoverflaten, mest sannsynlig vil stammen ikke dannes, og pæren vil vokse i diameter til ca 11-13 mm.
I et annet år vil pærene allerede kunne vokse en liten stilk, ikke mer enn 30 cm høy, men i det tredje året kan knoppene allerede begynne å knytte seg. Og fra den fjerde har du et visst antall fullverdige voksne løker som er i stand til å blomstre voldsomt og lenge. Hvis du har planlagt på forhånd for inneværende sesong avl av liljer med luftpærer og ønsker å få så mye plantemateriale som mulig, anbefaler erfarne blomsteroppdrettere å fjerne liljeknoppene før de begynner å blomstre. I dette tilfellet danner blomsten et større antall luftpærer, og de vokser merkbart større, noe som betyr at de vil ha mer styrke for videre forankring og vekst. Men det er varianter som ikke danner løk i prinsippet, så denne avlsmetoden er ikke egnet for dem, dette er asiatiske typer liljer, rørformede varianter, samt "Tiger Lily" og "Sargent".
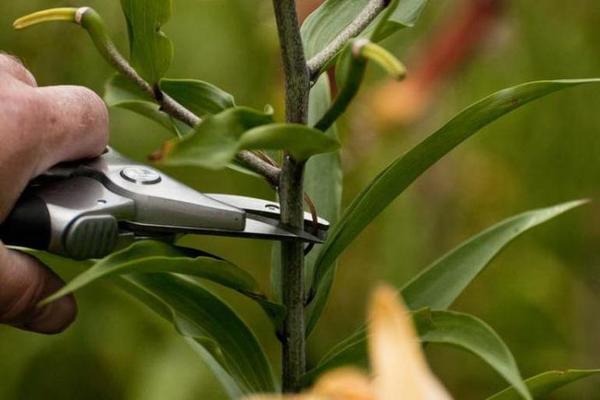
Vertikal roting av skjæringen

Skjæring er en velkjent formeringsmetode som brukes for både innendørs planter og hageblomster. Det er nødvendig å gjøre dette om våren. Skill en blomsterskudd 10-14 centimeter lang fra planten, ikke mer. Bruk bare veldig skarpe og desinfiserte verktøy, plantens helse avhenger i stor grad av dette.Forbered en blomsterpotte på forhånd med næringsrik jord og et lag ekspandert leire (drenering er alltid en forutsetning for dyrking av løkplanter). Dypp stilken i roten og plant i jorda. I tilfelle det allerede er andre halvdel av mai på gården og det er varmt nok ute, kan du plante skjæringen direkte i det åpne bakken. Uansett, etter planting, vanner du skjærebrønnen og dekker med en lokk fra en kuttet plastflaske - i et slikt "drivhus" opprettes et ideelt mikroklima for forankring. Ikke glem å opprettholde fuktighetsinnholdet i jorda, og etter et par uker vil skuddet slå rot, du vil lære om dette ved utseendet på nye unge blader. Og etter en stund vil datterpærer begynne å danne nær bunnen av skjæringen, på dette tidspunktet anbefales det å spudde planten for å øke antallet. På sensommeren - tidlig på høsten må de dannede løkene skilles og plantes slik at de dannes og vokser. Blomstring i dette tilfellet vil mest sannsynlig være i det andre året.
Horisontal roting av skjæringen
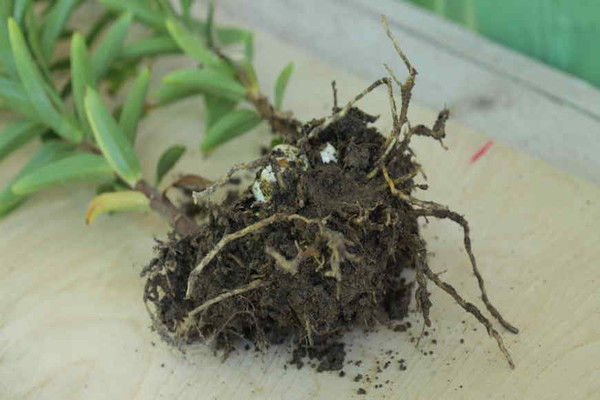
En veldig praktisk reproduksjonsmåte, der du ikke kan ofre blomstring i inneværende år, men utføre alt arbeidet etter slutten. Og du kan også bruke liljen fra buketten som ble presentert for deg, hvis du likte blomsterskyggen så mye at du ønsket å dyrke den på nettstedet ditt (vel, eller for eksperimentets skyld). Du trenger en plantestamme, men hvis du tar den fra et blomsterbed, må du ikke kutte den ved roten, la en del av skuddet ligge med blader slik at fotosynteseprosessen ikke stopper og løken kan forberede seg på vinter. Velg et skyggefullt sted, forbered jorden ved å grave den opp og rydde den av ugress, lag en fure på ikke mer enn 3 cm dyp, legg skjæringen horisontalt der og dekk den med jord. Deretter må du vanne rikelig, og du kan bruke et av stoffene som akselererer forankringsprosessen: "Epin", "Zircon", "HB-101". Deretter dekker du jorden med folie eller geotekstiler en stund for å forhindre fordampning av fuktighet og opprettholde en optimal temperatur. Etter omtrent et par måneder dannes det løk på håndtaket, som kan plantes neste vår.
Og for vinteren, ikke glem å kappe jorden for å beskytte plantene mot frysing. På samme måte kan du få plantemateriale i en leilighet. For å gjøre dette trenger du en boks for blomster, ekspandert leire og næringsrik jordblanding. For vinteren flyttes boksen med stiklinger og pærer best til en innglasset balkong, forutsatt at temperaturen der er over null (ellers vil planten fryse i boksen). Etter et år kan løkene transplanteres i jord eller plantes i forskjellige beholdere slik at de vokser til ønsket størrelse.
Lily forplantning: bladroting
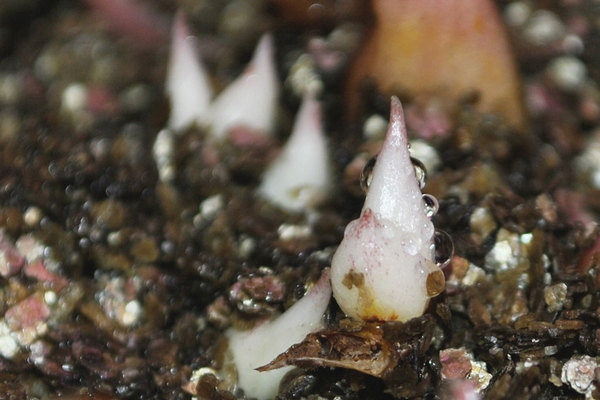
Liljer er virkelig allsidige planter når det gjelder avlsmetoder! La oss diskutere hvordan du kan rote et blad og få en løk fra det. Denne metoden er best egnet for følgende varianter: "Snøhvit", "Tiger", "Regale", "Maksimovicha lilje", "Thunberg lilje", samt for svovelfargede og langblomstrede liljer. Det er nødvendig å plukke (bare plukke, ikke kutte av) bladene fra den øvre halvdelen av stammen i perioden da planten danner knopper. Planter deretter bladene i en næringsrik jord, men ikke rett, men i en liten skråning (halvparten av bladet skal være i bakken). Plantering gjøres best ikke i åpen mark, men i beholdere med et dreneringslag, fruktbar jord og et topplag av elvesand. Dekk plantene med en pose eller en plastflaske, bygg et drivhus, ventiler daglig, og etter 3-4 uker vil du legge merke til at små løker dukker opp ved foten av bladene. Fra dette tidspunktet kan lokket fjernes. I vinterperioden skal beholderen plasseres i et kaldt, men ikke frysende rom. Alternativt kan du begrave den i hagen din og klippe den på toppen.Om et år vil løkene være klare til transplantasjon, men det vil ta ytterligere 2-3 år før de får styrke og forbereder seg på blomstring.
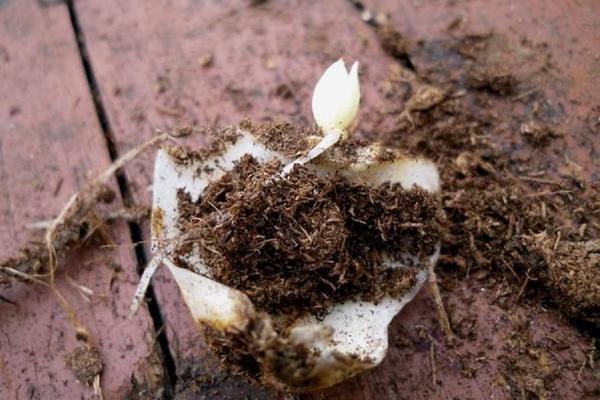
Reproduksjon ved hjelp av vekter
En fantastisk måte å avle liljer på, som er egnet for alle varianter av liljer, uten unntak, påvirker ikke helsen til morpæren og lar deg få en god mengde materiale for planting. Du kan jobbe når som helst på året, noe som også er veldig praktisk. Hvis løkene til påskeliljer eller tulipaner er hele, består løken av en lilje av skalaer. Vanligvis er de ytre skalaene litt bøyd utover, så det vil være veldig enkelt å skille dem. Og du kan skille omtrent en tredjedel av det totale beløpet uten å skade hovedpæren. Men det er bedre å ikke la seg rive med og begrense deg til det ytre laget, siden det er dette materialet som til syvende og sist vil være det mest produktive - takket være en slik skala vil du motta omtrent 6 pærer i løpet av en tidsperiode, men de vil blomstre først etter 2-3 år.
Så snart salget av plantemateriale begynner i butikkene (ofte skjer dette allerede på slutten av vinteren), kan du handle. Med den nødvendige kunnskapen kan du nå kjøpe bare en løk av hver variant du liker og dermed spare mye. Forbered en tett pose og fyll den med torv, kokosnøtt, sphagnum eller bare en næringsrik torvblanding du ønsker, slå små hull i den for å gi ventilasjon. Skill den ytre raden med flak fra pærene, legg dem i en pose med fyllstoff, og dekk med fuktet fyllstoff også. Bind posen og legg den på et varmt sted der den vil bli i en måned ved en temperatur på ca 22-25 grader Celsius. Etter denne tiden, gjennom posen, vil du se at løk har begynt å danne seg på vekten. Om et par måneder vil de ta form så mye at de kan plantes i separate beholdere og transplanteres i et blomsterbed i slutten av august eller i september. Blomstringen kommer om et par år. Hvis du planlegger å forplante ikke kjøpt materiale, men liljer som vokser i blomsterbedet ditt, så vil det være mest praktisk å gjøre dette om høsten. På dette tidspunktet går pæren i hvilemodus, den kan graves ut for å flytte til et nytt sted uten frykt for å skade planten. Fortsett deretter på samme måte, men etter at løkene vises på vekten og planter dem i forskjellige beholdere, plasser dem i et rom med lavere temperatur (ca. 15-16 grader Celsius) for å observere plantens naturlige årlige syklus. .
Forplantning av liljer: såing av frø
Ikke den mest populære avlsmetoden for løkplanter, men siden det er et sted å være, vil vi også diskutere det. Formering ved å så frø er bare mulig for artsorter, denne metoden er ikke egnet for hybrider. Dette er en veldig omhyggelig og lang prosess, og oftest brukes den bare av spesialister som lager nye arter. Men dette betyr ikke i det hele tatt at du ikke kan prøve å dyrke liljer fra frø. Men noen typer liljer må kunstig pollineres, dette er den eneste måten å få et fullverdig plantemateriale på. Og uavhengig frø av høy kvalitet kan fås fra følgende varianter av liljer: "Lily Henry", "Tibetan lily", "Lily Uiolmotta", "Shaffrannaya", "Daurskaya", "Regale", "Martagon", "Lilia Maksimovich "," Hengende lilje ". Lily frø kan deles inn i to typer: over bakken og under jorden. De første utvikler seg som de fleste planter - bladene kommer ut til overflaten og vokser. Det andre - bladbladene forblir i bakken, og det første virkelige bladet kryper ut av bakken. Frøkassene må samles så snart de blir mørkere, for hvis du venter lenger, er det veldig lett å gå glipp av øyeblikket og miste frøene. Hvis du har et stort antall frø tilgjengelig, kan du så dem direkte inn i blomsterbedet.Hvis mengden er begrenset, anbefales det å forhåndsdyrke frøplanter hjemme (så, plukk deretter i separate potter), og når det blir sterkere, transplanter det i hagen.
Når det gjelder reproduksjon av liljer med blomstrende frø, må du vente lengst - minst fem år, og muligens mer.
Disseksjon av bunnen
Og til slutt en ytterligere uvanlig måte å avle liljer på. Den åpenbare ulempen er at morpæren dør, men antallet dannede datterpærer vil være mye større enn i alle andre tilfeller. Bruk derfor denne metoden bare hvis du er klar til å donere en av de voksne liljen. Om våren tar du en voksenpære og skjærer forsiktig bunnen (bunnen av pæren der røttene vokser). Etter det, plant det, men ikke som vanlig, men tvert imot - opp ned. Etter det trenger du bare å vanne og fjerne ugress, mulch for vinteren. Og om våren, etter å ha gravd opp pæren, finner du mange "babyer" som må plasseres i blomsterbedet for videre vekst.
Oppsummering
Vi diskuterte ni forskjellige måter å avle liljer på, takket være det du kan øke antallet vakre liljer i sommerhuset. Noen metoder er mer arbeidskrevende, andre tvert imot er veldig enkle. Ja, i de fleste tilfeller må blomstringen vente i flere år, men når den kommer, vil du motta stor tilfredshet og glede fra arbeidet du har utført. Velg den mest praktiske måten for deg og gå for det!