Hvordan forplante chokeberry.
Innhold:
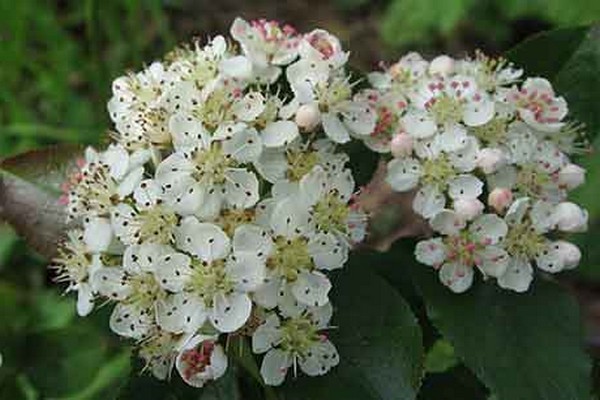
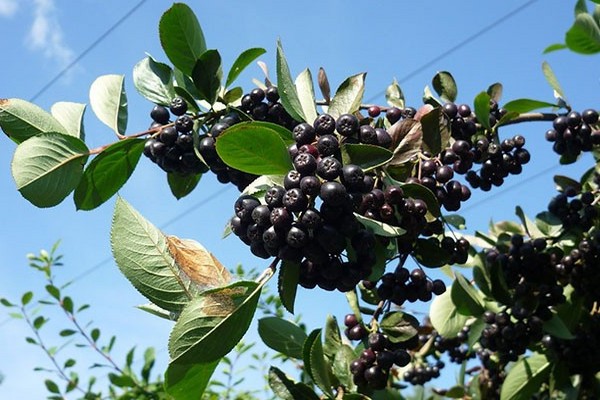
Chokeberry er veldig glad i både voksne og barn. I tillegg er det mange nyttige egenskaper i bærene, for eksempel er det chokeberry som bidrar til å senke blodtrykket, derfor bruker hypertensive pasienter ofte disse medisinske bærene. Etter at du har plantet den første rognebusken, stiller du imidlertid umiddelbart spørsmålet om hvordan du får flere fra en plante. Vi er glade for å kunne informere deg om at selv en nybegynner kan spre denne kulturen. Denne planten regnes som upretensiøs, ikke veldig kresen, derfor vokser den i mange regioner i landet vårt, og i dag vil vi fortelle deg hvordan du formerer denne busken.

Avlsmetoder for chokeberry.
Det er best å forplante denne avlingen om høsten. Du kan imidlertid gjøre dette arbeidet om våren. Du bør umiddelbart gjøre en reservasjon, på grunn av det faktum at i forskjellige regioner, forskjellige klimatiske forhold, vil timingen for arbeidet med reproduksjon av busker selvfølgelig være utmerket. Det er derfor du først og fremst bør ta hensyn til værforholdene og koordinere dem med hagekalenderen. Hvis du formerer chokeberry om høsten, er det best å gjøre dette i september eller oktober. Det er ikke vanskelig å ta vare på plantingene i fremtiden, og hvis du formerer busken om våren, er det bedre å utføre plantearbeid i mars eller april. Tenk imidlertid på de klimatiske forholdene i regionen der du bor. Derfor må alt gjøres i tide. Chokeberry forplantes med mange metoder. For det første er dette stiklinger, og for det andre fjerning av stiklinger, samt deling av busker. Du kan forplante den svarte chokeberry ved frø, gjennom poding, og også gjennom dannelsen av rotsuger. Det skal sies at reproduksjon med frø og poding er den minst effektive i sammenligning med de tidligere foreslåtte metodene, og derfor er det best å for eksempel gjøre stiklinger hvis du er en nybegynner. Men bare erfarne gartnere kan plante en plante eller plante frø. Hvis vi snakker om stiklinger, så kan det utføres både om våren og om høsten. For å kutte de ønskede grenene, er det best å velge unge skudd. Stiklinger blir kuttet i slutten av mai eller begynnelsen av juni. Og så dyrkes de i drivhus eller hotbeds. Det skal sies at de også overvintrer der. Men det vil være mulig å plante stiklinger på et permanent habitat først neste sesong. Svært ofte er gartnere engasjert i stiklinger om høsten. Til dette brukes allerede lignifiserte ettårige, det er slike skudd som er bedre tilpasset nye forhold. Dessuten plantes disse prosessene umiddelbart på et nytt sted. I prinsippet slår de rot normalt. Hvis vi snakker om å dele busken, bør det bemerkes at det er best å dele de gamle plantene. De må ha sterke skudd og et godt rotsystem, det er bedre å gjøre dette om våren, før denne prosedyren, anbefales det å vanne chokeberry intensivt, etter transplantasjon blir plantene også vannet rikelig med vann og jorden rundt er løsnet. Lag er forankret hovedsakelig om våren. Til dette brukes både ett- og toåringer. Det er disse skuddene som slår rot best i jorden og danner røtter. For å forplante chokeberry med lagdelingsmetoden, må du grave ut en slags spor, bøye skuddene til bakken, dekke med løs jord og vente på dannelsen av rotsystemet. Men det vil være mulig å skille skuddene fra moderbusken først neste sesong. Det skal også sies at noen ganger slår ikke nye planter rot. Mange skudd dannes vanligvis i nærheten av chokeberry buskene, derfor blir rotsugere ofte transplantert til nye habitater, og skiller dem fra moderbusken. Og de gjør det gjennom hele sesongen. Imidlertid er det mest effektivt å utføre disse prosedyrene om sommeren og våren. Nye planter må gis tid til å tilpasse seg nye forhold. Men for å forplante svart chokeberry med frø i veldig lang tid, i tillegg må slikt plantemateriale stratifiseres, men til tross for dette er spiringsgraden av frø fortsatt veldig lav, planten utvikler seg veldig lenge. Chokeberry kan forplantes raskere ved poding, dette må gjøres om våren, men for at skjæringen skal slå godt på den nye planten, må du gi busken gunstige vekstforhold og ta vare på den ordentlig . I dette tilfellet slår imidlertid ikke vaksinasjonen særlig godt rot. Vel, vi har beskrevet de viktigste avlsmetodene for chokeberry, og nå vil vi gå videre til en mer spesifikk beskrivelse av de presenterte avlsmetodene.
Stiklinger.
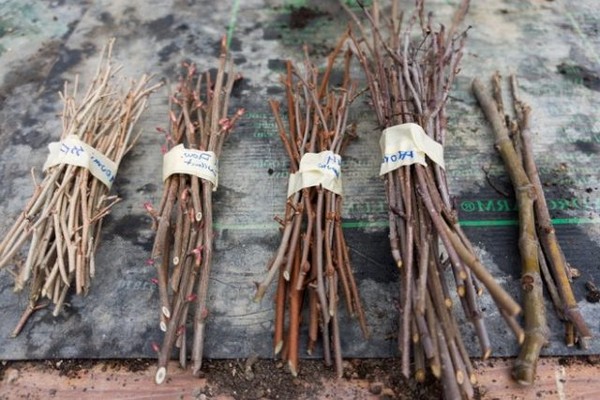
Det er enkelt og enkelt å forplante chokeberry ved stiklinger. Dessuten trenger du ikke spesiell kunnskap. Det er best å gjøre stiklinger om høsten, siden resultatet vanligvis alltid er positivt etter det. Men du trenger ikke å ta vare på planten intensivt, men hvis du ikke klarte å rotere plantematerialet om høsten, kan du lagre det til våren, ingenting vil skje med stiklingene. Skuddene må være lange nok, innen 10-20 cm. Snittet må være skrått, de lignifiserte skuddene må kuttes. Det er best å ikke bruke de øvre delene av grenene, kutte av grenene i midten. Hver skjæring skal ha omtrent seks aktive knopper. Imidlertid er kuttet oftest fortsatt rett. Det vil være mulig å plante stiklinger umiddelbart i løs og fruktbar jord. Det er lurt å plassere dem på et godt opplyst sted. Over bakken skal det være to knopper igjen på hver skjæring. Vanligvis slår skuddene rot i løpet av en måned, derfor, tidlig på våren, allerede i mars eller april, begynner plantene å vokse og utvikle seg intensivt. Stammesirkelen rundt skjæringen anbefales å bli mulket. Dette hjelper plantene til å overvintre normalt. Hvis det er mindre enn en måned igjen før frostens ankomst, er det best å la stikkene ligge til våren, for dette kan du sortere dem etter type og deretter knytte dem i bunter. De nedre delene av stiklingene må enten være pakket inn i en fuktig klut eller plassert i godt fuktet sand. Ikke la underlaget tørke ut; for dette legger gartnere ofte i tillegg stiklinger i en pose. Så grenene vil definitivt ikke tørke ut. Sikkerheten til stiklingene må overvåkes til våren, det anbefales å inspisere dem hver uke og, så langt det er mulig, fukte sanden eller stoffet. Det vil naturligvis være nødvendig å lagre stiklingene på et kjølig sted. For dette er et kjøleskap eller en kjeller ganske egnet. Du kan plassere bunter med stiklinger på sommerverandaen. Tidlig på våren bør stiklinger plantes i separate beholdere; engangskopper er bra for dette. Etter det må du vanne skuddene godt, og så snart stabilt varmt vær er etablert ute, kan stiklingene sendes til det åpne bakken. Sørg for at jorden er godt oppvarmet. Noen ganger forplantes svart chokeberry av grønne stiklinger. For å gjøre dette må du kutte av ettåringer, unge stiklinger, med en lengde på ikke mer enn 15 cm. Du kan kombinere forretninger med glede, samle de resterende toppene fra buskens grener etter beskjæring. De nedre bladene må kuttes av, to øvre blader må forbli på hver skjæring, de må også forkortes. Det er tilrådelig å kutte en liten del på bunnen av håndtaket; røtter vil danne seg på disse stedene i fremtiden.Etter det vil det være nødvendig å holde stiklingene i en vekststimulator i en halv dag, og først etter det kan de plantes i drivhuset. Avstanden mellom skuddene bør være omtrent 3 cm. Etter plantingen må bakken være godt vannet. For at stiklingene skal slå godt rot, bør lufttemperaturen i drivhuset være omtrent pluss 22 grader. Hvis det blir veldig varmt i drivhuset, ikke glem å ventilere det. Vanligvis, på en måned, slår stiklingene rot, legger ned røtter, slik at det beskyttende lyet kan fjernes litt etter litt. For at plantene skal vokse mer intensivt, vil det være mulig å mate dem med en liten mengde organisk materiale eller mineralgjødsel. Etter det er det tilrådelig å løsne jorda, vanne plantene og klippe det øverste laget. Vanligvis slår stikkene perfekt rot, men hvis du gjør noe galt, kan det hende at rotsystemet til skuddene ikke dannes.
Lag.
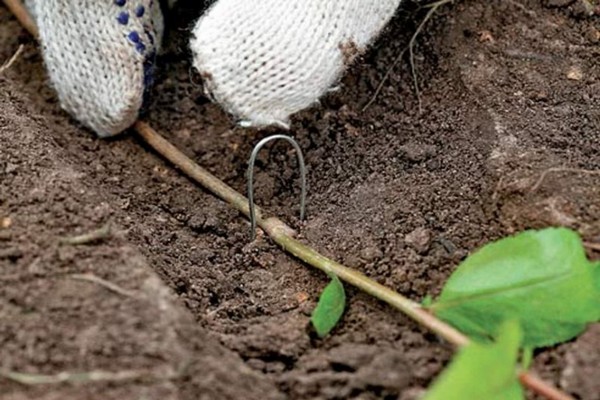
Chokeberry reproduserer også godt ved lagvis metode. For å gjøre dette må du velge sunne årlige skudd, helst de som ligger direkte i rotdelen. Du kan legge til fem lag om gangen, men for mange skudd kan tømme bushen, slik at bjørnebæret selv ikke har nok næringsstoffer, så det er bedre å rote ikke mer enn to eller tre grener samtidig. De valgte lagene skal først forkortes med et par centimeter, og først deretter vippes til bakken og knuses. Det er i stedet for bruddet at røtter vil dannes i fremtiden. For å fikse skuddene på jordoverflaten, kan de presses ned med steiner eller festes med stifter. De forberedte sporene er dekket med fruktbar og løs jord. I løpet av et par måneder slår skudd vanligvis rot, derfor, nærmere høsten, dannes rotsystemet til nye planter godt, men det er bedre å skille lagene fra moderbusken i neste sesong.
Deling av busken.
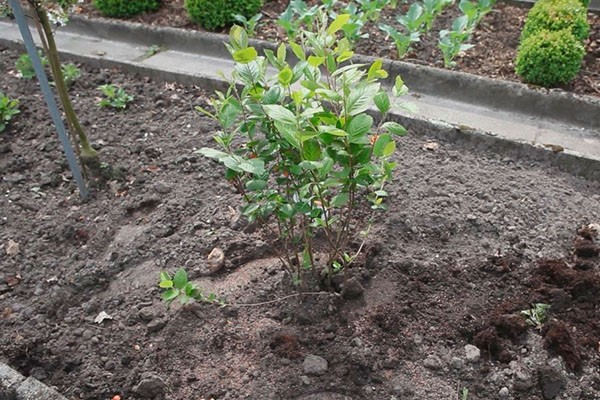
Når modne bjørnebærbusker blir gravd opp, blir de ofte delt. Videre bør det på hver ny plante forbli kraftige skudd, så vel som et velutviklet rotsystem. Hver busk bør også ha minst 3 unge skudd. For å forhindre at infeksjon kommer inn i sårene, må de behandles med enten knust kull eller hageplass. Landingsgropene selv er også forberedt på forhånd. For å gjøre dette, grave hull i passende størrelser, plasser frøplanter der, dekk dem med fruktbar jord, legg ofte til litt superfosfat og humus der. Avstanden mellom plantene skal være omtrent halvannen til to meter. I fremtiden må du ta vare på disse plantene på samme måte som for modne busker. Ikke glem å fukte jorda, mate plantene. Under vanning forbrukes vanligvis 5-10 liter vann per busk. Ikke glem å forkorte skuddene umiddelbart etter plantingen. På senhøsten må stammesirkelen med busker bli mulket med torv, humus eller halm. For at planten skal tilpasse seg bedre på et nytt sted, må du forsiktig rette rotsystemet under transplantasjon, hvis du transporterer frøplanter, må du ikke skade plantene. Det er best å transportere disse buskene ved å pakke dem inn i en fuktig klut. Før du planter frøplanter i åpen mark, anbefales det å legge chokeberry i vann i flere timer, slik at rotsystemet er mettet med fuktighet. På den tredje dagen blir plantene vanligvis plantet etter at busken har delt. Noen ganger, før planting, forbereder gartnere en spesiell blanding av leire, smør røttene med denne snakkeren, slik at råte ikke utvikler seg.
Rotavkom.
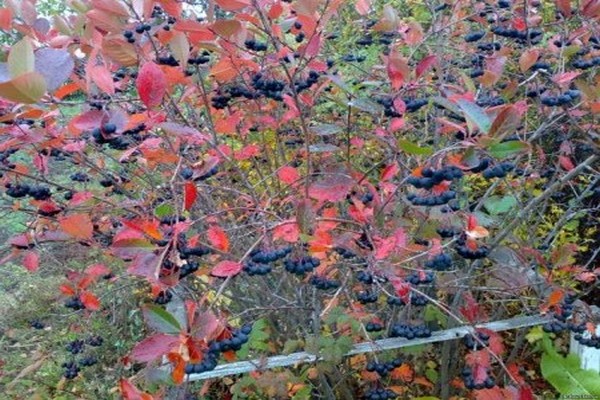
For å skille de unge skuddene fra chokeberry bush, må du bruke en spade. Ikke glem at denne veksten skal ha gode røtter, før du planter avkomene på et nytt sted, må du forkorte lengden litt, bokstavelig talt med et par knopper.Først da vil du kunne rote buskene i det nye området. For planting er det best å velge et godt opplyst sted. Hvis vi snakker om jordtypen, er det ingen grunnleggende krav. På saltvannsmasse utvikler imidlertid plantene seg ikke godt. Men grunnvannet kan godt ligge nær jordoverflaten, chokeberry stiller ikke spesielle krav til jordfuktighet. Det er derfor disse buskene ofte blir plantet som hekker. Et vakkert grønt gjerde er hentet fra svart fjellaske, og sunne og smakfulle bær dannes på grenene.
Frø.
Du kan forplante chokeberry rogn frø, men det er ikke lett. For å gjøre dette må du være tålmodig. Det vil ta lang tid å dyrke busker fra frø. Først bør du velge de mest modne bærene, la dem stå i rommet for at de skal gjære. Bare etter noen dager kan bærene gnis gjennom osteklut, fruktkjøttet fjernes vanligvis og de resterende frøene vaskes med rent vann. Dermed kan du forberede chokeberry for dyrking. For at frøene skal komme sammen, bør de blandes med våt sand, fjernes i flere måneder på et kjølig sted, for eksempel i en kjeller. Noen ganger er dette underlaget også lagret i kjøleskapet. Mange fagfolk slipper ganske enkelt en beholder med dette underlaget i snøen, og etter vinteren spirer de frøene. Frøbedene tilberedes i midten av april, ikke dekk dem for dypt, ellers vokser plantene kanskje ikke. Frø fordeles jevnt over stedet, dekket med løs og fruktbar jord. For at plantingen skal se raskere ut, kan du mulke det øverste laget av jorden med humus. Frøene vil imidlertid spire i veldig lang tid, de første skuddene vil vises ikke tidligere enn en måned senere. Men det vil være mulig å transplantere unge skudd til et nytt habitat bare om et år. Som du forstår, vil det ta deg veldig lang tid å dyrke sorte koteletter med frø. Ikke glem at plantene fortsatt må passes på, og derfor er gartnere ikke veldig glad i denne avlsmetoden. Når det første bladparet vises på plantene, må sengene tynnes ut. Alle syke og svake spirer anbefales å kastes. La det være en avstand på 5 cm mellom buskene. Når det dukker opp et par andre blader på hver stilk, blir plantingen tynnet ut igjen. Den siste tynningen utføres når skuddene er de sterkeste og sunneste. Avstanden mellom plantene skal være minst 10 cm. Chokeberry trenger litt plass for vekst og utvikling. Ikke glem å vanne plantene i tide, mat dem. Landet rundt sengene må løsnes, ugress fjernes fra stedet. For toppdressing brukes oftest organisk gjødsel, tidligere fortynnet i vann. I dette tilfellet blir organisk materiale ført inn i jorden flere ganger per sesong, dette gjøres slik at plantene får styrke og vokser mer intensivt.
Pode.
Chokeberry forplantes ofte gjennom poding. For å kunne podet planten riktig må du imidlertid følge noen retningslinjer. Aksjen tilberedes på forhånd. For å gjøre dette vannes frøplanten rikelig, støv fjernes fra bladene og kuttes også av. Spalten skal være dyp nok. Videre bør alt arbeid utføres forsiktig, hageverktøyet må være skarpt og sterilt. For å transplantere planter må du bruke en solid stilk. Det er best å velge de øvre skuddene, klippelengden skal være omtrent 15 cm, det må være 2-3 aktive knopper på den. I løpet av et år vil løvet vokse, under kvisten skjerpes det som en kile, slik at stilken passer tett inn i spalten som dannes. Etter vaksinasjon bør lageret pakkes inn med en film, og alle sår skal smøres med knust kull eller hagelakk. Stokken slår godt rot hvis luftfuktigheten er høy ute.For dette pakker gartnere inn podningsstedene med en plastpose, og skaper dermed et slags drivhus. Vanligvis er dette lyet festet under selve vaksinasjonen. Etter en måned kan filmen fjernes hvis unge blader vises på scion, noe som betyr at reproduksjonen var vellykket. Ikke glem at dette bør gjøres før sapstrømmen starter. Hvis du er litt forvirret i begrepene, vil vi forklare deg: grunnstammen er frøplanten du vil podde denne eller den kulturen på, og transplantatet kalles selve stilken. Det er enkelt. For å forplante svart chokeberry på denne måten må du velge beslektede, vinterharde varianter, i så fall vil podingen lykkes.
Konklusjon.
Chokeberry formeres, som du forstår, på en rekke måter. Derfor, før du deltar i denne hendelsen, må du bestemme metoden og studere funksjonene til en bestemt prosedyre. Om høsten er det lettere å forplante bjørnebæret, hvis du gjør dette om våren, så om sommeren må du ta vare på plantingen spesielt kvalitativt. Chokeberry formeres perfekt ved stiklinger eller ved å skille rotskuddene fra moderbusken. Disse plantene er ikke dårlige og deler. Men svart chokeberry formeres vanligvis av frø bare av erfarne gartnere. Hvilken måte å velge er opp til deg. Vi på sin side fortalte deg om hver, slik at du i det minste er teoretisk forberedt, og nå er det opp til øvelse.