Om dyrking av meloner i drivhus
Innhold:
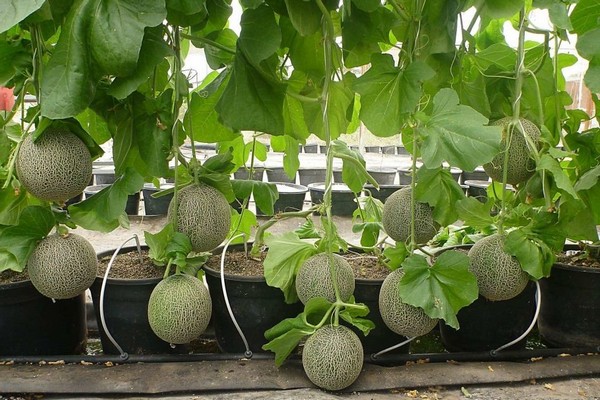
Før du begynner å dyrke melon drivhus, må du gjøre deg kjent med kompleksiteten i denne prosessen. Denne artikkelen vil hjelpe både de som ønsker å vite hvordan de får en sjenerøs høst av meloner, og de som tviler på om det er verdt å ta denne virksomheten.
Fordeler og ulemper med å dyrke meloner i et drivhus
Siden alle varianter av meloner er ganske termofile, vokser de bedre i drivhus enn uten ly. La oss snakke om fordeler og ulemper med å dyrke denne avlingen i et ly.
Fordeler:
- på grunn av mikroklimaets stabilitet i drivhus - en stor sannsynlighet for modning av frukt;
- kompetent forbedring av drivhus letter dyrkingsarbeidet;
- været påvirker ikke kulturens vekst i det hele tatt og kaster ikke problemer for gartnere (for eksempel på grunn av vinden i åpen jord kan fruktene snu og forvirre pisken);
- under tak er fruktene lite utsatt for ulike sykdommer og angrep av skadelige insekter;
- du kan få en høst i enhver klimasone i Russland;
- avlingen som vokser i drivhuset er søtere og mer saftig.
Ulemper:
- en ganske høy pris for et drivhus og arbeidet med installasjonen;
- økonomiske utgifter til utstyr som opprettholder det nødvendige temperaturregimet og belysningen;
- manuell pollinering er påkrevd da det ikke er insekter i drivhus.
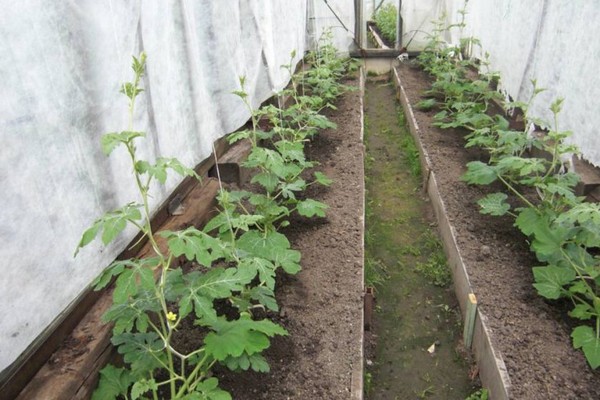
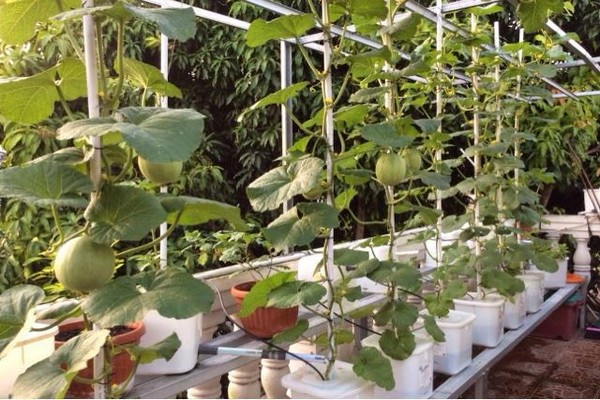
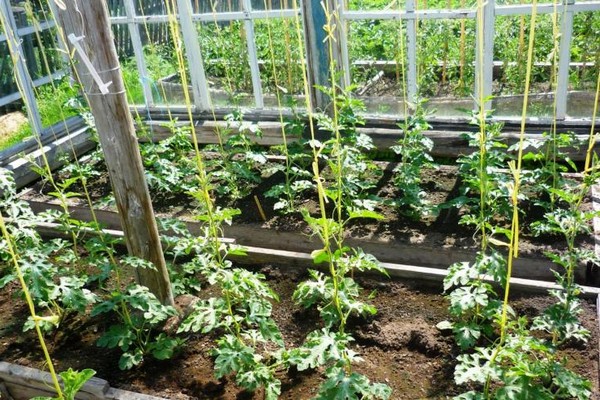
Om å klargjøre drivhuset for såing
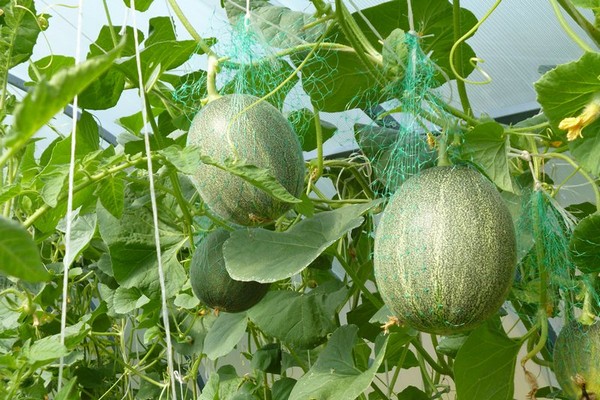
Meloner og kalebasser føles like gode både i en film og i et polykarbonat -drivhus. Kontroller tilstanden til drivhusstrukturen før du starter forberedende arbeid med jorda. Det bør ikke være hull, siden en varmekjær kultur ikke tåler utkast. Trellis (2 stk / 1m2), nettingstoff og fester for strømpebånd er nødvendig. Drivhusøkonomien må være utstyrt med tilstrekkelige kilder til å opprettholde ønsket temperatur og belysning. Vurder å behandle drivhuset ditt med en soppdrepende forbindelse.
Riktig tilberedning av drivhuset er det første trinnet i å få en god melonhøst, og mye avhenger av det.
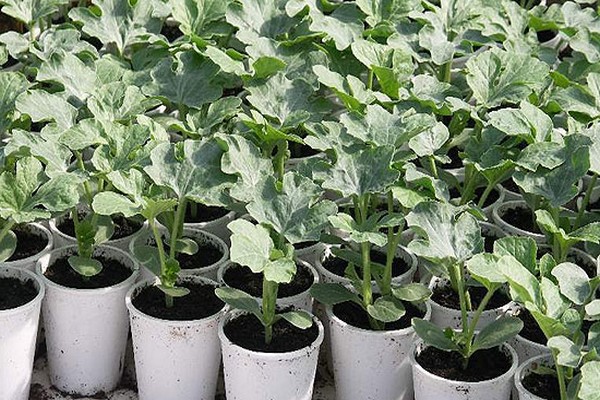
Om å dyrke melon fra frøplanter
Melonplanter selges i spesialforretninger. Men hvis du vil ha en spesiell variant eller er i tvil om hva du tilbys, er det mulig å begynne å vokse fra frø selv. La oss snakke mer om dette.
Om hvilke varianter som er egnet for drivhus
Melonutbyttet avhenger vanligvis av hvilken variant du velger. Du bør ta deg tid til å studere variantene og bestemme dine krav.
Vanligvis, for drivhusskjerm og drivhus, velger de:
- "Lada". I denne sorten, som i andre mellomsesongvarianter, begynner melonene å modnes omtrent 80-85 dager fra øyeblikket med sterke skudd; melon oval, gul-oransje, overflaten har et maskemønster; fruktvekt - opptil 1,5 kg. Lada er resistent mot forskjellige sopp.
- "Mallet". Denne tidlig modne sorten har en saftig og søt fruktkjøtt og tynn hud, fruktene begynner å modnes 60-65 dager fra øyeblikket med sterke skudd; oval melon, lys gul, vekt - opptil 3 kg."Mallet" er kjent for sin produktivitet og er motstandsdyktig mot forskjellige sopp.
- "Voller". Denne tidlig modne sorten har ømt, søtt kjøtt og tynt skinn, fruktene begynner å modnes omtrent 62-65 dager fra øyeblikket med sterke skudd; melonen er gulbrun, kammeret med frøene er ikke stort, frukten veier opptil 3 kg. "Voller" kjennetegnes ved utmerket transport, utmerket lagring og også ved at den ikke er redd for mugg, antraknose og fusarium.
Hvis du bor i nord og ønsker å plante en melon, velger du "Barnaulka", "Amber", "Altai", etc.
Hvordan finne kvalitetsfrø
Når du velger frø, bør du ta hensyn til varianter og hybrider som gir gode avlinger i dine klimatiske forhold og modningstiden. Hvis du vil dyrke meloner i drivhusforhold, kan du ikke klare deg uten varianter fra tidlig og midt i sesongen. Vurder avlingens evne til aktivt å vokse og bære frukt på chernozem -jord.
Frø må velges nøye for din jordtype. Du vil kunne plante frøene dine først etter noen år. Dette er ikke tilfellet med hybrider.
Det er best å kjøpe melonfrø fra spesialforretninger. Ved å undersøke frøpakkene vil du lære om tidspunktet for såing og planting av frø i jorda. Ikke kjøp frø som er nær slutten av utløpsdatoen!
De som prøvde å håndtere meloner og tok frø fra naboer og bekjente, vet at frukten etter tre år blir skrøpelig (utsatt for degenerasjon). For å løse dette problemet, bytt frøene etter 3-4 år eller kryss varianter med hverandre og få hybrider.
Slik sår du riktig
Frø plantes fra en høsting for tre til fire år siden. Hvis du tar frø fra fjorårets høsting, blir resultatet trist.
Til å begynne med herdes og bearbeides frøene:
- plantematerialet er sortert ut og bare sunt og tett er igjen;
- frøene dynkes i en løsning av kaliumpermanganat i 30 minutter (de som har dukket opp blir kastet)
- etter 30 minutter, vasket i rent vann;
-så blir frøene herdet (plassert i vann ved en temperatur på 55-65 grader i 2 timer, deretter tørket i en dag ved en temperatur på 18-23 grader, til slutt holder de frøene i kjøleskapet i 15 til 17 timer og over natten ved romtemperatur).
Så de forberedende tiltakene er over, og du kan fortsette å så i permanent jord. Hvis drivhuset ikke er klart, plantes frøene i små torvpotter og oppbevares i vinduskarmen. Også midlertidig planting kan utføres i andre beholdere, etter å ha laget hull i bunnen tidligere (for eksempel plastglass).
Jordens sammensetning: 90% torv, 10% sand. Treaske tilsettes også jordblandingen med en mengde på 1 glass per 10 liter jord).
Et annet alternativ for egnet jord er mulig: jord og humus (3: 1)
Legg 2-3 frø i beholdere fylt med jord (plantedybde ca. 20 mm). Dekk landingen med plastfolie. Med en dagtemperatur på 23-26 grader, og en nattetemperatur på 17-19, vil skudd dukke opp snart.
Deretter må du velge en av de sterkeste og sunneste spirene. Det vil være det viktigste. De resterende spirene kuttes under en liten rot. Oppmerksomhet: svake skudd trekker seg ikke ut, da du kan skade rotsystemet til den viktigste.
Omsorg for frøplanter
En viktig del av omsorgen for nyklekkede spirer er jordfuktighet. Vanning bør gjøres slik at det ikke kommer fuktighet på greenene. Jordoverflaten bør dekkes med sand for å unngå utvikling av Blackfoot sykdom.
Så snart et par blader dukket opp, er det på tide å bruke kompleks gjødsel (disse gjødselene påføres to ganger, andre gang - etter 2 uker).
Et viktig stadium i omsorgen for frøplanter er herding. Før plantingen av plantene på et permanent sted i drivhuset, utføres herdingsprosedyrer. Nemlig: bringe temperaturregimet til 17 grader i løpet av dagen og 12 - om natten.
Når den vokser, plasser beholderne med urter lenger og lenger fra hverandre for å hindre at de berører.
Plant plantene på et permanent sted i drivhuset når de blir sterkere (5-6 blader på hver).
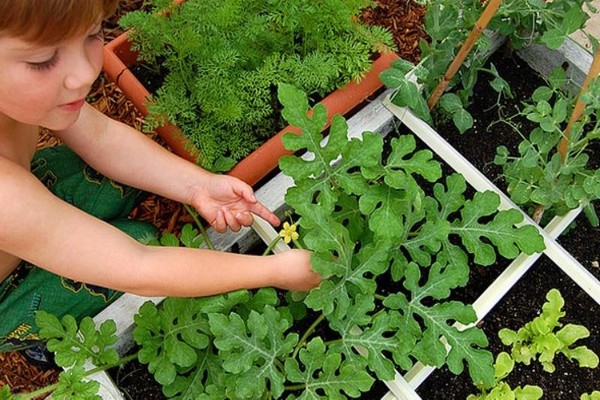
Om funksjonene ved landing
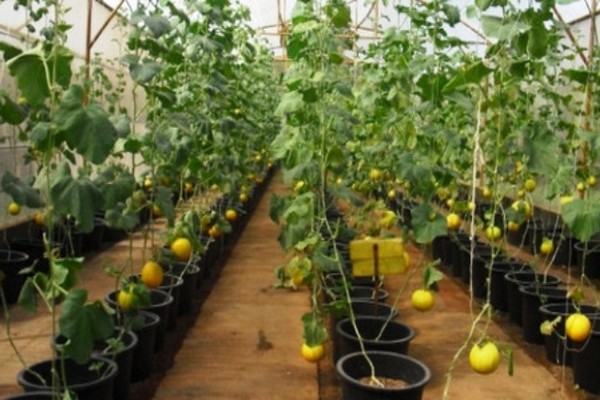
Når du planter frøplanter i et drivhus, er det viktig å følge agrotekniske regler for jordforberedelse og plantingsdatoer. For et anlegg bør et areal på minst 0,4 m2 tildeles, eller med andre ord - det bør ikke være mer enn to anlegg per 1 m2. Det er best å plassere landingen i et rutemønster.
Om jordforberedelse og desinfeksjon
Melonkulturen elsker løs, sandig og chernozem jord. Saltholdighet og forsuring av jorda må ikke tillates. Som et forebyggende tiltak vil aske, litt kritt eller kalkstein komme til unnsetning. De blir hentet inn og gravd opp bakken i drivhuset. Interessant nok øker tilsetningen av aske sukkerinnholdet i melonene.
I det andre tiåret av våren bør jorden gjødsles med organisk materiale. For dette er humus, fugleskitt, råtnet gjødsel, torv eller innholdet i kompostgroper egnet. Siden organisk gjødsel blir degradert en stund, vil planten få næring i doser og lenge. I tillegg frigjør organisk materiale varme ved nedbrytning, og under nedbrytning øker oksygenstrømmen for rotsystemet. Alt dette vil komme godt med for unge umodne planter.
Organisk gjødsel bør fordeles til en dybde på ca 0,3 m, etter mengde - 2 kg / 1 m2.
Så snart gjødsel påføres, utføres varm vanning og støv med jord.
Om nødvendig bør drivhuset og jord desinfiseres med:
- Agroteknisk metode, der prioriteten er avlingsrotasjon; med denne metoden erstattes avlingene en gang hvert 1-2 år (når du velger denne metoden, anbefales det å bygge flere små drivhus);
- Biologisk måte, der prioriteten er å øke veksten av fordelaktige mikroorganismer for å skape en gunstig mikroflora; for dette blir spesielle løsninger introdusert i jorden (for eksempel Baikal eller Baktofit) eller jorden blir dampet eller frosset (en mer radikal metode for å erstatte jordlaget brukes også);
- Kjemisk metode, der det er en kjemisk effekt på jorda; minus ved metoden er at den patogene mikrofloraen med skadedyr blir ødelagt sammen med den nyttige, restaureringen utføres takket være organisk gjødsel (med mangan, svovel, formalin, etc.); når du bruker den kjemiske metoden, ikke glem personlig verneutstyr.
Om utarbeidelse av plantematerialer
Så du har vokst og herdet frøplanter. Det er på tide å lande henne under drivhuset etter det forberedende arbeidet med jord og ly.
Hvis det tas en beslutning om å dyrke melon umiddelbart under drivhusforhold, er det nødvendig:
- varm opp frøene ved siden av varmeenhetene: legg vevde poser med frø nær batteriet, eller du kan til og med sette dem på det hvis oppvarmingstemperaturen ikke overstiger 50 grader;
- desinfiser frø med spesielle preparater eller bløtlegging i en løsning av kaliumpermanganat (15 minutter);
- spire frø ved bruk av torvtabletter eller en toalettpapirrulle eller våt gasbind.
Om tidspunktet for planting
De klimatiske forholdene i en bestemt region og belysningen av drivhusøkonomien påvirker plantingsperioden for en melonkultur fullt ut. I gjennomsnitt kan vi snakke om slutten av april, begynnelsen av mai; det viktigste er at jorda varmes opp til 15 grader, temperaturen på dagtid går ikke under 20 grader, og nattemperaturen faller ikke under 15.
Hvis du lar temperaturen synke under 10 grader, dør plantene rett og slett.
Hvis drivhuset ditt har et justerbart belysningssystem, oppvarming og mulighet for høye senger, er ikke eksterne værforhold forferdelig for deg. I dette tilfellet varierer tiden for planting av frøplanter.
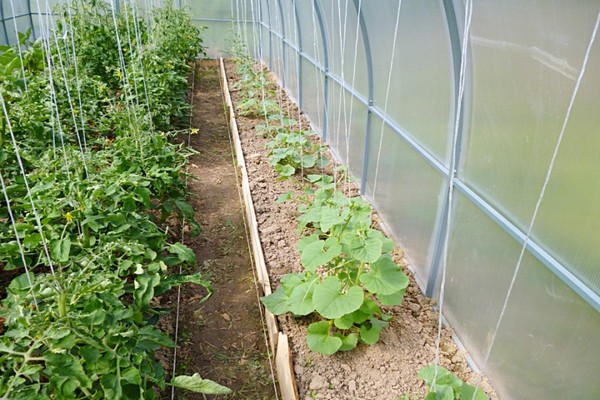
Om å plante frøplanter under et drivhusly
Å plante unge planter i drivhusjord utføres strengt i henhold til ordningen.
- Forbered først plantehullene. Avstanden mellom hullene må være minst 0,5 meter. La avstanden mellom radene være 0,7-1 meter.
- Frøplanter i potter eller i andre beholdere er godt vannet.
- Hver spire, forsiktig, for ikke å berøre røttene, slippes ut av potten.
- Plasser spiren i hullet slik at nivået på spirekragen på spiren er høyere enn jordnivået. Dette er gjort for å forhindre forfall.
- Røttene er dekket med jord med en liten ås og tamp den litt.
- Rotsystemet til hver spire er drysset med elvesand.
- Dekk plantene med et lag fuktig papir slik at plantene slår rot og tilpasser seg et nytt sted.
Om stell av meloner i drivhusindustrien
Meloner og kalebasser krever nøye omsorg og økt oppmerksomhet. Selvfølgelig er det umulig å få en god høst av meloner uten å bruke tid og krefter. La oss snakke om detaljene.
Om riktig temperatur
Når unge frøplanter plantes i et drivhus, bør temperaturregimet opprettholdes innenfor + 25 + 30 ° С med ventilasjon (med mindre det selvfølgelig ikke er så kaldt ute). Etter at planten har rotfestet, kan temperaturen reduseres med fem grader. Temperaturregimet om natten bør opprettholdes minst +15 grader.
Om fuktighet og vanning
Vann melonen ved hjelp av en dryppmetode eller en vannkanne med varmt vann. Det viktigste er å prøve å ikke våte greenene. Det er viktig å huske at for denne kulturen er vannlogging av jorda mye verre enn tørke. Seksti prosent fuktighet er grensen som det ikke anbefales å krysse.
Om belysning
Meloner trenger belysning opptil 14 timer om dagen. Mangel på sollys fører til at avlingen blir underutviklet, og planten kan visne bort. I dette tilfellet kan det være nødvendig å bruke belysningsenheter (spesielle fytolamper som avgir ultrafiolett lys). Slike lamper er veldig nyttige for meloner, ettersom planten trenger ultrafiolett stråling. Det er også mulig å bruke LED- og lysrør.
Om dressinger
På grunn av mangel eller overskudd av mineraler i bakken, kan melonen råtne. Derfor bør fôring behandles ansvarlig.
Som en kompleks gjødsel for meloner brukes nitroammophoska, ammophoska, etc. Den påføres omtrent hver 2. uke under selve roten før blomstring (10 gram / 10 l vann). En plante krever 5 til 7 liter av en slik løsning under roten.
På blomstringstidspunktet og dannelsen av eggstokkene tilsettes superfosfater (40 g / 10 l vann) til planten. En plante krever 2,5 gram gjødsel per 1 m2.
Når fruktene er modne, er det på tide å huske på aske. Den kan spres på bakken, eller du kan lage en tinktur av aske.
Alt om drivhusbestøvning
Hvis du har mulighet til å åpne et drivhus i løpet av dagen, kan bier pollinere. Ellers må denne prosessen utføres av gartneren. Bestøvning utføres ved hjelp av en hannblomst. Finn den: den er stor, og det er en bule ved basen. Det er nødvendig å plukke hannblomsten og holde den over blomsterskålene til hunnblomstene. Pass på at pollenpartiklene faller ned i bollene. En hannblomst kan bestøve fire kvinnelige.
Prosessen kan gjentas. For ikke å plukke hannblomster, kan du ta pollen fra dem med en bomullspinne.
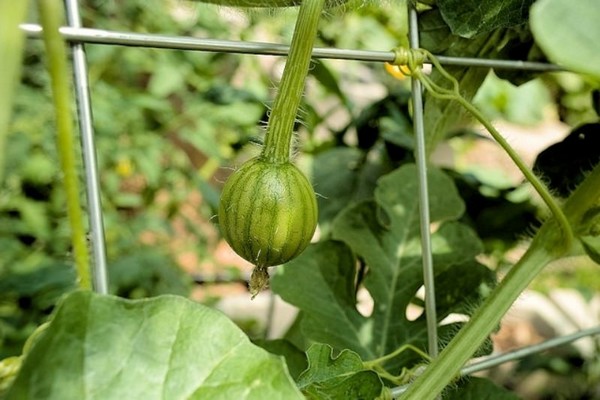
Om tynning
Tynning bør gjøres når frukten har nådd størrelsen på et høneegg. 5-7 meloner skal stå på den ene vippen, og de andre skal kuttes. Ellers vil det ikke være nok næringsstoffer til alle fruktene, og melonene vil være umodne. Deretter bør du vanne sengene forsiktig og legge til kompleks gjødsel.
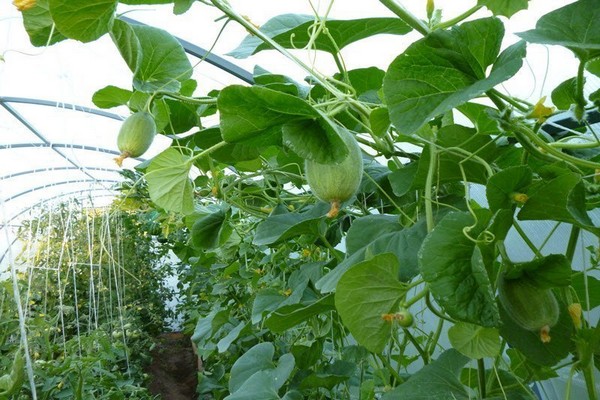
Om dannelse av busker
Små meloner vises ikke på hovedstammene, men på sidestenglene. I denne forbindelse er det viktig å klemme spirene over de tredje bladene på plantene.Senere, herfra, vil veksten av hovedstammen være litt høyere, og under - vippene.
Den andre fasen av buskens dannelse utføres i det øyeblikket lengden på vippene har nådd to meter. Klem både hovedstammen og sidene. Hvis du ser pisk som ikke har frukt, bør de kuttes. Det anbefales å drysse stedet for hvert snitt med kullkorn. Interessant nok er det mulig å justere antall eggstokkene. For å gjøre dette, la tre til fire eggstokkene ligge ved foten av stammen. Følg deretter plantens dannelse og fjern unødvendige trinnbarn i tide.
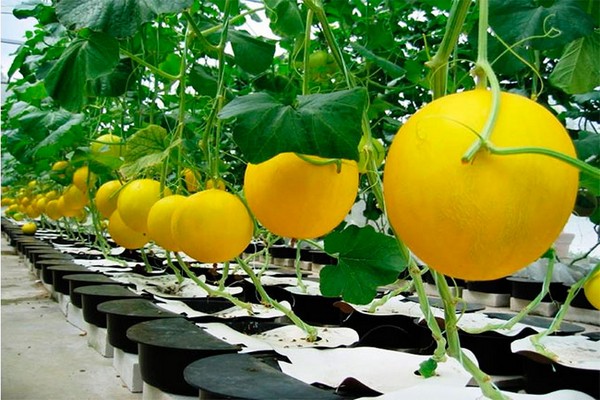
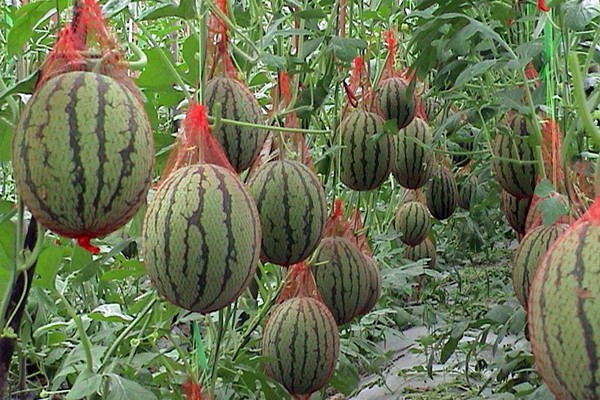
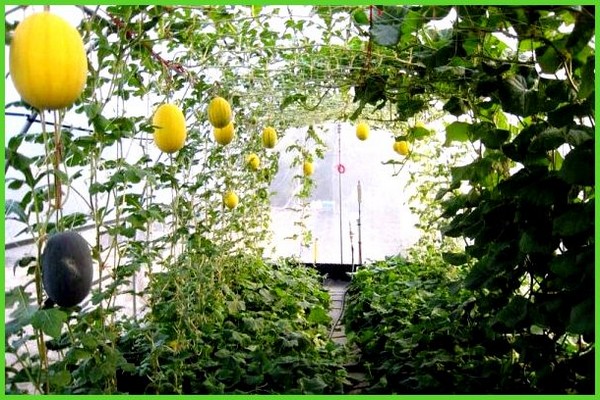
Høsting og lagring av avlinger
De begynner å høste meloner, og sørger for at fruktens modenhet har nådd normen. Et utpreget maske på fruktene, en jevn farge og en utpreget evne til melonen til å bryte vekk fra piskene, vil fortelle deg om dette.
En tidlig moden variant kan som regel lagres i opptil 2 måneder, en sen - opptil seks måneder. Meloner med stilker (3 cm) plukkes om morgenen eller kvelden. Fruktene er igjen direkte på stedet i 4 dager med snu 4 ganger om dagen. Deretter fjernes melonene til et mørkt, kjølig rom (det er bra hvis dette rommet er desinfisert og kalket med kalk).
Det er bedre å legge fruktene på hyller som er drysset med sagflis, eller henge dem. Lagringstemperatur - + 3 + 4 grader med en luftfuktighet på 80 prosent.
Sorter fruktene regelmessig for å unngå å ødelegge dem.
Om sykdommer og skadedyr av meloner i et drivhusrom og om tiltak for å bekjempe dem
Melonsykdommer i drivhus er hovedsakelig assosiert med sopp. Soppsykdommer kan oppstå fra frø, ugress, jord og skadedyr.
La oss snakke om de vanligste sykdommene.
Pulveraktig mugg gir en hvitaktig blomst på utsiden av bladene. Gradvis sprer det seg slik at det omslutter hele bladet, hvoretter det visner og faller.
I motsetning til meldugg i Peronosporiose plakett vises på undersiden av bladene
Når en plante blir smittet Fusarium blader og lianer blir hvite. Sykdommen sprer seg raskt og melonen kan forsvinne på 14 dager.
Tegn Antraknose er brune flekker (ofte fargen på rust) på bladene. Flekkene har en dårlig struktur.
Fra Rotrot røttene blir tynnere, noe som fører til ødeleggelse og død av planten.
Kontrolltiltak: fjern de berørte områdene, behandle med en soppdrepende løsning.
Sykdomsforebygging: vannet sparsomt, løs jord, fjern ugress og kle jord og frø før du planter.
La oss nå merke til skadedyrene til melonen.
Fra melonbladlusen, små gulaktige insekter, som samler seg under bladplatene og suger plantens juice, begynner melonen å visne. Behandlingen utføres med en løsning av vaskesåpe (100 gram / 10 liter vann) eller Actellika og Karbofos.
Fra Wireworm planten er innhyllet i larver som spiser saften og fruktkjøttet fra kulturen. Disse oransjebrune ormlignende insektene i skjellene vil ganske enkelt spise planten hvis de ikke blir merket av. Som et forebyggende tiltak legges knuste eggeskall i hullene under planting. Det er også nødvendig å observere vekstrotasjon og fjerne ugress.
Edderkoppmidd kan gjenkjennes av tilstedeværelsen av et spindelvev. Dette mørke, lille insektet samler seg under bladbladene og lever av plantens saft. Flåttkontroll utføres ved bruk av kjemikalier med acaricider.
Å dyrke melon i drivhusforhold er ikke lett og veldig ansvarlig, og gartneren må gjøre seg klar til å utføre en hel rekke saker. Men disse gjerningene vil absolutt bli belønnet med en høst av søte, saftige og store frukter av melonen elsket fra barndommen.