Hvordan dyrke et epletre fra et frø.
Innhold:
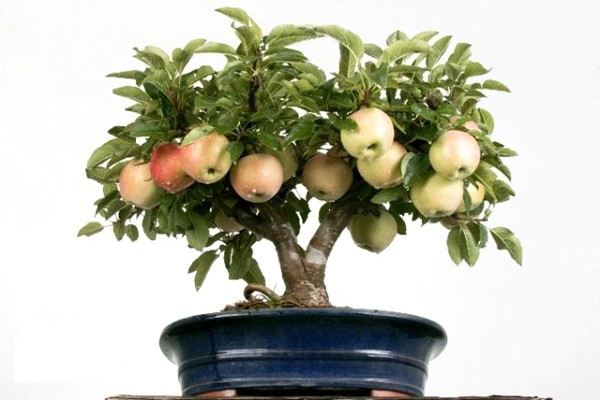
Amatørgartnere har lenge vært praktisert i å dyrke en rekke frukter fra frø: appelsiner, sitroner, kiwi, avokado, granatepler. Epler er mye mer populære enn mange av dem og er dessuten tilpasset våre breddegrader, slik at den vokste frøplanten godt kan transplanteres til en sommerhytte i fremtiden. Ifølge eksperter har epletreet, som ble dyrket fra frøet, utmerket immunitet og motstand mot kulde, lever og bærer frukt i svært lang tid. Den eneste ulempen ved et slikt eksperiment er at du ikke kan forutsi hvilke epler som til slutt vil vises på treet ditt. Et epletre som vokser fra et frø, beholder ikke de forskjellige egenskapene til moderplanten, så du kan få både smakfulle og saftige frukter og små sure, nesten uspiselige epler. Epletreet begynner å bære frukt ikke tidligere enn fem år senere, alt avhenger av sorten - noen ganger venter gartnere femten år på den første høsten. Så valget er ditt-å vente på resultatene av eksperimentet, i håp om å utvikle en ny velsmakende variant, eller å bruke en ett år gammel frøplante som grunnstamme, poding av en annen variant på den. Men først må du gjøre deg kjent med reglene som må følges for å dyrke et epletre med frø - vi vil snakke om dette i denne artikkelen.
Hvordan velge frø.
Ethvert botanisk eksperiment begynner alltid med valg og forberedelse av plantemateriale. Uansett hva du gjør med treet ytterligere (bruk det som en bestand eller dyrk det som en uavhengig variant), må du begynne med frøene. Hvis du for eksperimentet skal velge et eple på egen hånd, så velg frukt som ikke vokser i dypet av kronen, men nærmere kanten, de var en av de første befruktede og fikk mer sollys, noe som betyr at de vil gi plantemateriale av høyeste kvalitet. Hvis du for eksperimentet bruker et kjøpt eple, vil du jobbe med det du har og håpe på et godt resultat. Uansett skal frøene være brune, faste og uskadede.
Hvordan forberede frø til planting.
Fra det øyeblikket du fjerner frøene fra eplet og til det blir plantet, vil det gå mer enn en eller to dager. Prosessen med å forberede plantematerialet er ganske lang og inkluderer vasking, bløtlegging og lagdeling. Ingen av disse trinnene kan hoppes over, så vær tålmodig og iverksett tiltak.
Vask. Du trenger friske frø tatt ut av eplet bare i dag eller i går, dette øker sjansene for et godt resultat. Skyll frøene under rennende vann, og skyll av enhver hemmer som kan hemme frøspiring. Det er bedre å bruke varmt vann, vasketiden er 3-5 minutter.
Bløtlegg. Legg deretter frøene i en beholder med varmt vann og suge i tre dager, mens du vasker dem og skifter vann hver dag. For beholderen trenger du ikke velge et spesielt varmt eller kaldt sted, romtemperatur vil være nok, det er bare viktig å bytte vann og sørge for at beinene ikke begynner å bli muggne. På den tredje dagen, etter at du har byttet vannet igjen, tilsett et vekststimulerende middel. Det kan være "Epin", "Sodium humate", Biohumus eller et hjemmelaget preparat fra aloejuice, dagen etter la du merke til at beinene begynte å hovne opp.
Lagdeling. Denne prosessen bidrar til å øke sjansene for spiring av eplefrø, ettersom den vellykket etterligner de naturlige forholdene når frøene våkner etter dvale.Det er forskjellige måter å stratifisere på, valget er igjen ditt.
Bruk alltid flere frø, siden ikke alle etter hvert vil spire.
Bland frø med sand og torv i et forhold på 1: 1,5: 1,5 (for eksempel for en teskje frø, en og en halv teskje sand og torv). I stedet for torv og sand kan du bruke sagflis med torv eller sand med sagflis ved tilsetning av knust aktivert karbon. Fukt blandingen litt til den er fullstendig mettet og la den stå i 5-7 dager slik at beinene hovner godt. Etter det må blandingen stå i kjøleskap i et par måneder i grønnsaksrommet, og husk å jevnlig kontrollere at prosessen går bra, at blandingen ikke har tørket ut og at det ikke har oppstått mugg på beinene.
I tillegg er det en annen, enklere metode som brukes av nybegynneren i Valaam -klosteret. De plukket epler om høsten, i høstsesongen, tok frø av dem, tørket dem og plantet dem umiddelbart i bakken i kort avstand fra hverandre, og ble dypere med 2-3 cm. Etter en stund kom vinteren, og frøene ble stratifisert til et naturlig miljø. Og om våren spiret epletrærne, så ble de plantet og fortsatte å passe på.
Vi planter et epletre.
Hovedforskjellen mellom å dyrke et epletre og vokse frøplanter av hageavlinger er at det anbefales å bruke jord fra hagen til epletreet, fra stedet du planlegger å plante treet i fremtiden, så tilpasningsprosessen vil bli mye enklere. Det vil være nødvendig å tilsette gjødsel til jorden ved å bruke 15 g superfosfat, 100 g treaske og 10 g kaliumgjødsel (for eksempel kaliumsulfat) for hver fem kilo. Hell ekspandert leire i en eske med dreneringshull, og deretter den forberedte jorda, og fordel deretter de klekkede beinene jevnt, dyp dem med ikke mer enn 1,5 cm, og vannet dem. Sett boksen på den letteste vinduskarmen og ikke glem vanlig vanning, jorden skal ikke tørke ut.
Funksjoner ved omsorg for en ung plante.
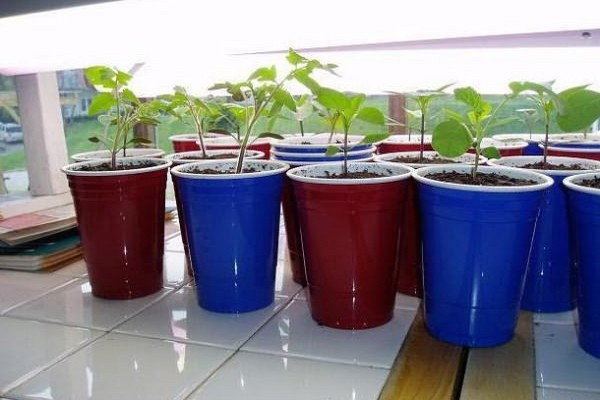
Etter at spirene vises på overflaten, kan du:
- transplanter dem i større potter og fortsett å vokse innendørs.
- hvis været tillater det, så transplanter til et hagebed i en avstand på 25 cm mellom skuddene og samme mengde mellom radene.
- plant på et permanent sted hvis plantene er sterke og sterke og du ikke tviler på levedyktigheten deres.
Fra det øyeblikket frøene spirer, anbefales det å transplantere epletreet tre ganger de første fire årene. Første gang dette skjer er når du flytter frøplanter fra en felles boks til en personlig potte, stimulerer denne transplantasjonen veksten av den sentrale taprot. En ny transplantasjon vil være nødvendig når epletreet er ett år gammelt. Flytt frøplanten til en større beholder mens du trimmer eller bøyer senteroten 90 grader. Og for tredje gang blir treet transplantert til et permanent sted hvor det vil vokse hele livet. Disse tre transplantasjonene akselererer begynnelsen av frukting.
Etter utseendet på fire sanne blader, kan du sortere og fjerne naturen. Forskjellen mellom ville epletrær og varianter på spirestadiet er at de har kortere skudd, mindre og lysere blader, og små tynne torner finnes på stammen. Dyrket epletrær har ikke torner, bladene er mørkere i fargen, større i størrelse, og stammen er tykkere.
Flytt til et fast sted og videre omsorg.
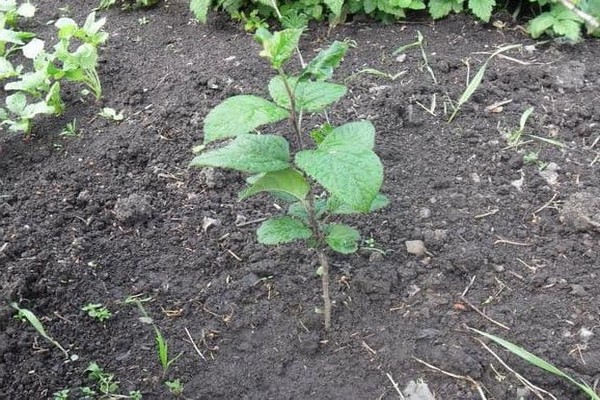
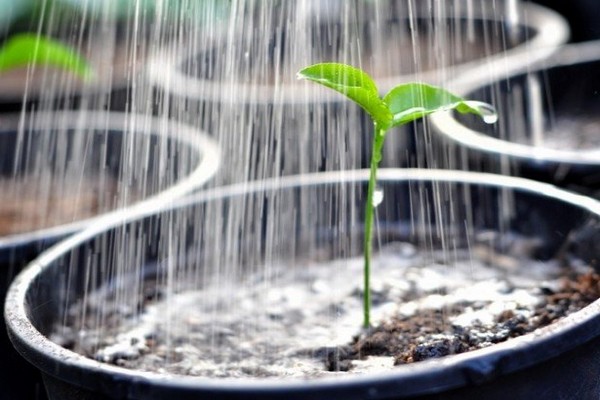
Hvis du vokste frøplanter i containere, anbefales det å plante dem på et permanent sted i april-mai eller september-oktober, alt avhenger av klimatiske trekk i ditt område. Hvis plantene ble dyrket i det åpne feltet, kan transplantasjon til et permanent sted utføres når som helst fra april til oktober. Når du velger et sted for et epletre, husk at dette treet elsker solen veldig mye, ikke plant det ved siden av et gjerde, bygninger og andre trær, slik at alt dette ikke skaper en skygge.Sørg for at vannspeilet er dypt nok og at jorda på plantestedet ikke er for sur. Forbered plantehullet på forhånd, bruk gjødsel (humus, aske og et kompleks av mineraler), bland dem med jorda, fukt godt. I de første årene er det bedre å ikke bruke gjødsel og kyllingavfall for gjødsling av epletreet, siden treets røtter fortsatt er for ømme og kan bli brent av slik gjødsel.
Etter planting skal epletreet vannes en gang i uken og samtidig løsne jorden slik at det ikke dannes skorpe på overflaten, noe som hindrer tilgang av luft til røttene.
Det første året etter planting kan du hoppe over toppdressing, epletreet vil ha nok av gjødsel som du la til under plantingen. I de påfølgende årene kan du bruke både organisk og mineralsk gjødsel. Det er ekstremt viktig å ikke bruke nitrogengjødsling fra august, for ikke å provosere veksten av unge skudd. I løpet av denne perioden er epletreet mye mer nødvendig kalium- og fosforgjødsel (for eksempel kaliumklorid og superfosfat).
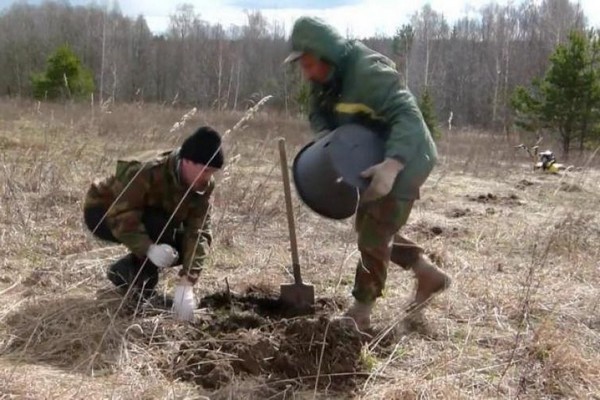
Hvis du planlegger å lage en bestand av planten, er det best å gjøre dette når frøplanten er to år gammel. I oktober graver du ut frøplanten, fjerner bladene og kutter den sentrale roten tjue centimeter unna rotkragen. Dekk rotsystemet og lagre frøplanten i en kjølig kjeller til våren, og på våren plant et epletre og vaksinér. Etter det, vanne plantene ukentlig, sørg for at jorden er gjennomvåt til en dybde på minst 50-60 cm.
Søyle epletre.
Selve prosessen dyrking det søyle epletreet er ikke annerledes enn det som ble beskrevet ovenfor. Den eneste forskjellen er at frøene må tas fra epler som har vokst på et søyle eple og vil være optimale hvis sorten er godt tilpasset for dyrking i de klimatiske forholdene i ditt område. Fortsett deretter i henhold til den allerede kjente ordningen: suge og stratifisere frøene, deretter plante og vokse.
De mest populære varianter av søyle epletrær er President, Medok, Ostankino, Moscow Necklace, Vasyugan. I motsetning til vanlige epletrær, som anbefales å brukes som grunnstokk, anbefales det å bruke et søyle epletre som er vokst av en stein som en løvfisk. For å gjøre dette podes det på en dvergbestand.
Oppsummering.
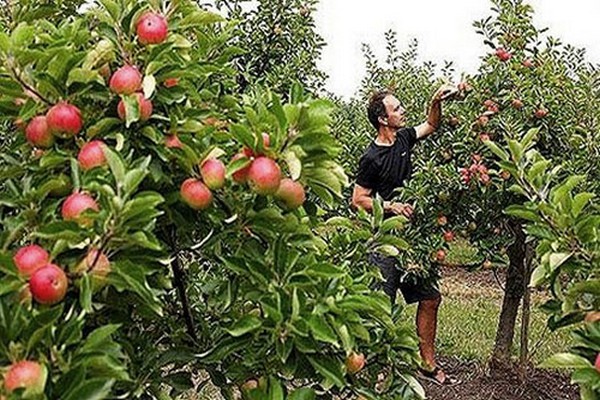
For å oppsummere alt ovenfor, er det trygt å si at det er fullt mulig å dyrke et epletre fra et bein. Som et resultat får du ikke bare et sterkt tre med høy frostbestandighet og sterk immunitet, men også et nytt utvalg av smakfulle, store og saftige epler.