Grønne løk på vinduskarmen: dyrkingsmetoder, plantings- og omsorgsregler.
Innhold:
En grønn løk tidlig på våren er det du trenger. Hver husmor ønsker å krydre retten med så mye grønt som mulig. Og det er ingenting enklere enn å krydre mat med en grønn, finhakket løk. Videre praktiserer mange husmødre dyrking av denne avlingen i vinduskarmen. Og mange vet ikke hvordan de bare skal gjøre det. Vi vil fortelle deg hvordan du kan dyrke grønne løk på vinduskarmen din og glede deg med friske grønnsaker, ikke bare tidlig på våren, men hele året.
Dyrking av grønne løk i vinduskarmen.
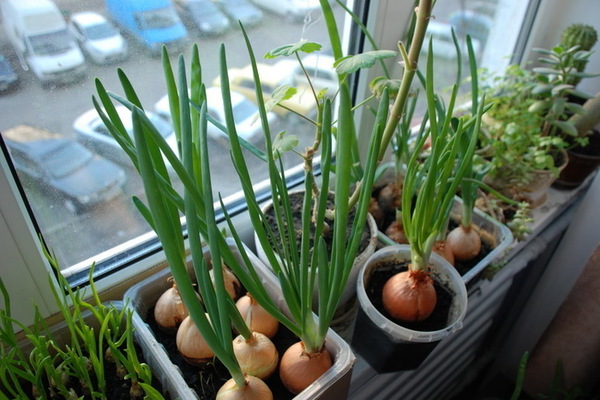
Foto av grønne løk i vinduskarmen
Grønn løk er lett nok til å vokse. For å gjøre dette må du ha flere tette løker og litt ledig plass i vinduskarmen, samt lyst og litt tid. Til fordel for dyrking av løk kan vi si at den er veldig rik på vitaminer, og i motsetning til hvitløk har den ikke en ubehagelig lukt. I tillegg begynner løkene som er samlet om sommeren i landet for mange husmødre å spire over tid, og det er synd å kaste dem. Derfor må det settes i verk.
Hvordan plante grønne løk på vinduskarmen?

Foto av grønne løk i vinduskarmen
Løk, som enhver plante, er veldig glad i fuktighet og lys. Derfor kan den spire i en hydroponisk hage. For å lage denne enkle strukturen hjemme, må du ta et vanlig plastbrett og deretter halvere det i 2 like deler. Som du kanskje har gjettet, legger vi i stedet for egg små løk der.
Velg de tetteste løkene, omtrent på størrelse med et kyllingegg, og forbered beholderen som følger. Stikk hull i bunnen av brettet slik at det ser ut som en pall. Det er bedre å ikke bruke et pappbrett, ettersom det svulmer opp og faller fra hverandre veldig raskt. Etter størrelsen på skuffen må du finne den riktige boksen. Der må du helle litt vann og legge den belastede strukturen på toppen. Fyll deretter brettet med løk, etter å ha kuttet av toppen av dem. Dette er nødvendig for at de grønne fjærene trenger bedre inn i lyset. Men hvis løken allerede har startet fjæren, trenger du ikke kutte den.
Du kan plassere brettet på en liten støtte laget av pinner slik at ikke hele løken er i vannet. Det er viktig å sikre at bare løkens røtter berører vannet. Ellers vil du i stedet for grønne fjær få en ubehagelig lukt og råte, som til slutt vil danne seg på selve pæren. Etter det legges en slags seng på vinduskarmen. Dette er nødvendig for å forsyne planter med lys og starte prosessen med fotosyntese. Men husk at de løkene som er nærmere vinduet vil vokse raskere. Derfor kan du enten komme med alternativer for kunstig belysning, eller snu boksen med jevne mellomrom i forskjellige retninger til lyset. Du kan bare sette en foliereflektor for sollys.
Noen ganger er det bedre å plante ikke alle løkene samtidig i en hydroponisk seng, men med en viss frekvens. Dette vil hjelpe deg å konsekvent kutte friske fjær og høste konsekvent, i etapper.
Hvordan dyrke grønne løk i en plastflaske på vinduskarmen?
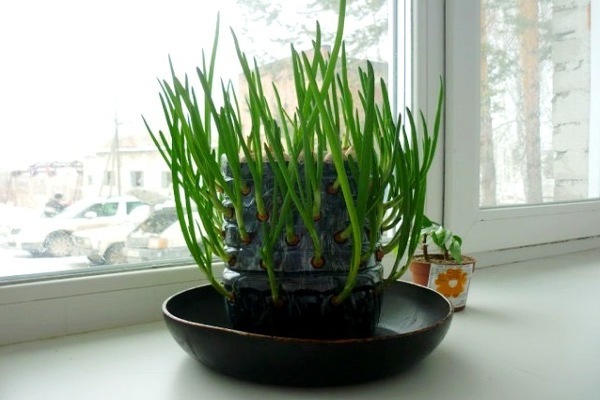
Foto av grønne løk i vinduskarmen
En annen uvanlig måte å dyrke grønne løk på en vinduskarme er å bruke en vanlig plastflaske. Du trenger en 5 liters plastflaske, jord og løk. Først må du legge litt jord på bunnen av flasken, og deretter begynne å kutte ut "hullene".I bunnen av flasken, i henhold til størrelsen på pærene, er det nødvendig å kutte runde hull i et rutemønster, opp til toppen av flasken, og gradvis redusere antall hull. Og tilsett mer jord. Deretter bør du legge det neste laget med løk og det neste jordlaget, og gradvis jobbe mot toppen til hele flasken er full. Så løkens røtter vil vokse inne i flasken, i bakken, og toppene vil vokse utenfor. I tillegg tar en slik struktur svært lite plass, og gir mye utbytte. Videre vil det være veldig praktisk for deg å kutte fjærene og gradvis bevege seg fra bunn til topp. Ikke glem å vanne hagen din. For at løken skal utvikle seg raskere, kan du legge til sand, torv eller annen fruktbar blanding i flasken sammen med jorden.
Prøv disse uvanlige måtene å dyrke grønne løk på vinduskarmen din og spis grønt hele året!